Saturday, June 26, 2010

Advanced Printer Sharing with hotplug

Hotplug is a set of scripts running upon certain predefined conditions. On today's Linux system, hotplug can do many things from auto mounting USB drive, pairing bluetooth devices to network configuration.

Seldom mentioned, but DD-WRT does offer (very preliminary) hotplug support. With almost no info on the web, the job is done by digging though DD-WRT's source code and various Linux documents.

  1. Replace DD-WRT's event handler with our own
    By default, DD-WRT registers /sbin/hotplug to handle all hotplug requests but the program, /sbin/hotplug doesn't follow standard hotplug rules, and, per my understanding, is a dummy and does nothing at all. So let's replace it with our own

    Create a startup script /opt/etc/init.d/hotplugd with only one line:

    echo /opt/sbin/hotplug > /proc/sys/kernel/hotplug

    Then set it to run upon start up
    chmod a+x /opt/etc/init.d/hotplugd
    ln -s /opt/etc/init.d/hotplugd /opt/etc/init.d/S95hotplugd

    run
    /opt/etc/init.d/hotplugd
    and check the result:
    cat /proc/sys/kernel/hotplug

    The output should be /opt/sbin/hotplug, which is our new event handler.

  2. Test drive hotplug
    So how does the hotplug work? below script will give you some idea to start with:
    Create /opt/sbin/hotplug with following:

    #!/bin/sh

    #For Debugging
    echo "Customized hotplug" >> /tmp/hotplug.log
    echo -------------$(date)----------- >> /tmp/hotplug.log
    set >> /tmp/hotplug.log

    set it as executable
    chmod a+x /opt/sbin/hotplug

    Unplug the printer, wait few seconds and plug the printer back.  Check the log by typing:
    cat /tmp/hotplug.log

    You can see there are bunch of environmental variables logged, two of them are worth noting:
    ACTION The value for "ACTION" variable can be "add" or "remove", corresponding to device plugin and removal.
    PRODUCT This is the unique device ID for the USB device, my printer is HP 1020 and value is 3f0/2b17/100.

    In a full Linux system, hotplug is much more complex. My script is a quick dirty hack but should be sufficient to handle USB printers.

  3. Configure hotplug to upload firmware to the printer
    Some GDI printer(aka Windows printer) will require extra work on Linux. Below is an example of my HP Laserjet 1020 but also applies to other HP laser printers like 1000, 1005, 1018, P1005, P1008, P1505 etc..
    You'll need two things to start with:
    The printer's firmware -- this must be in the printer before printing. Some of popular HP printers' can be downloaded from http://oleg.wl500g.info/hplj/
    usb_printerid -- this is used to detect if the firmware is already in place to prevent duplicated firmware uploading. Above link has one but that's for Broadcom devices. So I compile one for Atheros routers. Download here. Extract and put it to the router(samba, ftp or WinSCP).

    Assume we have the firmware in /opt/usr/local/lib/ and usb_printerid in /opt/usr/local/bin/, run
    chmod a+x /opt/usr/local/bin/usb_printerid

    And finally, here is the full script /opt/sbin/hotplug

    #!/bin/sh

    #For Debugging
    #echo "Customized hotplug" >> /tmp/hotplug.log
    #echo -------------$(date)----------- >> /tmp/hotplug.log
    #set >> /tmp/hotplug.log

    P910ND='/opt/usr/sbin/p910nd'
    PRINTERID='/opt/usr/local/bin/usb_printerid'
    FIRMWARE='/opt/usr/local/lib/sihp1020.dl'
    #replace it with your printer's firmware.

    if [ $DEVTYPE == 'usb_device' ] && [ $PRODUCT == '3f0/2b17/100' ]; then
    #replace with your printer's device id.
      if [  $ACTION == 'add' ]; then
        #check and upload firmware
        ${PRINTERID} /dev/usb/lp0 | grep -q FWVER || cat ${FIRMWARE} > /dev/usb/lp0
        #kill and restart p910nd
        kill -9 $(pidof p9100d)
        ${P910ND}  -b -f /dev/usb/lp0 0
      fi

      if [ $ACTION == 'remove' ]; then
        #printer removed, lets stop p910nd
        kill -9 $(pidof p9100d)
      fi
    fi

    The above script will upload firmware to printer then start p910nd daemon upon printer plug-in and stop p910nd when it's removed.

  4. Modified p910nd startup script
    With above script, DD-WRT will automatically configure the printer after the router is fully booted. However, similar approach has to be done during startup as the hotplug does not take effect at that moment.
    For unknown reasons, DD-WRT will NOT create /dev/usb/lp0 for printer even we have printer support enabled. As a result, we can't use this device node to detect the printer's presence.

    Here is a modified version of /opt/etc/init.d/p910nd startup script.

    source /mnt/root/.profile

    mkdir -m 755 -p /dev/usb
    mknod -m 660 /dev/usb/lp0 c 180 0
    sleep 1

    P910ND='/opt/usr/sbin/p910nd'
    PRINTER_ID='/opt/usr/local/bin/usb_printerid'
    FIRMWARE='/opt/usr/local/lib/sihp1020.dl'
    #replace with yours
    PNAME='LaserJet'
    #printer name id string, see below

    i=$(find /sys/devices/platform/ -name product -exec cat {} \; | grep -c ${PNAME})

    if [ $i != '0' ]; then
         ${PRINTER_ID} /dev/usb/lp0 | grep -q FWVER || cat ${FIRMWARE} > /dev/usb/lp0
         kill -9 `pidof p9100d`
         ${P910ND}  -b -f /dev/usb/lp0 0
    fi

    Notice the PNAME='LaserJet' line. The 'LaserJet" is part of the printer's name and can be used to check if the printer is plugged. To determine yours, run

    find /sys/devices/platform/ -name product -exec cat {} \;

    The result looks like that:
    HP LaserJet 1020 #printer
    DataTravelerMini #USB flash drive
    Atheros AR91xx built-in EHCI controller #USB controller

After that, follow the previous tutorial to install printer in Windows if you haven't done so. Now enjoy the convenience of hotplug.

Read More...

Printer Server for DD-WRT(the simple version)

With USB port on the router, a normal USB printer can be hooked and become a network printer with wired or wireless capabilities. As the router is usually on 24x7, there is no need to invest a (usually overpriced) dedicated printer server or plug the printer around.

The printer server program we use here is p910nd. It's a very small(only 8KB) daemon which simply redirects all printing command from PC to the printer.

Setting p910nd on the router can be a snap or very comprehensive depends on the printer. The best scenario would be sharing a Postscript/PCL compatible one and will be covered here.

Before start, you'll need a USB hub if your router has only one USB port as we now need to connect a USB drive and a USB printer. Unpowered hub is good for USB flash drive or hard drive with external power supply while I would suggest a powered hub for hard drive solely relied on USB power to prevent overload or damage to the HDD.

  1. Set DD-WRT support for USB printer
    If you haven't done so, check earlier post step #2. Make sure the USB printer support is selected.

  2. Install p910nd server and run it as a service
    Log in from PuTTY and run
    opkg install p910nd

    Now create /opt/etc/init.d/p910nd(delete all previous contents if the file is not empty)

    source /mnt/root/.profile
    mkdir -m 755 -p /dev/usb
    mknod -m 660 /dev/usb/lp0 c 180 0
    sleep 1
    P910ND='/opt/usr/sbin/p910nd'
    kill -9 $(pidof p9100d)
    ${P910ND}  -b -f /dev/usb/lp0 0


    Then set it to run as a service

    chmod a+x /opt/etc/init.d/p910nd
    ln -s /opt/etc/init.d/vsftpd /opt/etc/init.d/S30p910nd


    Reboot or manually run /opt/etc/init.d/p910nd to make the change take effect.

  3. Install printer in Windows
    So we have p910nd running in the router now back to the PC(and Windows). First, you need to have the printer driver installed on the local computer. Exact procedures depend on the printer, but a foolproof way is to plug the printer back to PC then run manufacturer provided driver setup file.

    After driver installation, in Windows XP, follow this guide.

    Can't find a detail guide for Windows 7 but its essentially the same as earlier Windows editions. Anyway, here is a quick one:

    For Windows 7,  Open Control Panel->Hardware and Sound->Devices and Printers, then right click the printer icon. Select "Printer Properties" then click the "Ports" tab on the properties window.

    The default port might be USB001 that's for local USB port. Click "Add Port..." button, then select "Standard TCP/IP Port" from the list. Click "New Port..." which will open "Add Standard TCP/IP Printer Port Wizard". Click next and fill the "Printer Name or IP Address" with router's IP.
    add-printer-1
    After clicking "Next", Windows will try to detect the printer port and will fail. That's OK. On the next page, select "Custom" then click "Settings...". This will bring you another window, the default setting with Protocol Raw and Port Number 9100 should work. Confirm the change then back to original "Ports" tab. Select the newly added 192.168.1.1 port as default and click "Apply".

    Now plug the printer back to router and try to print from Windows machine.
     

This is a ten-minute work if your printer is well supported aka. Linux friendly. However, things can get nasty for some GDI printer -- just name a few, the popular HP Laserjet 1010, 1018 and 1020. Also, you might want the p910nd to run only when the printer is connected. To solve all these problems, we need to make the router aware of printer's status change(plugging or removal) and run commands upon that. This is called hotplug and we can make some really neat solution with that.

Read More...

vsftpd: FTP Server for DD-WRT

I generally prefer Samba over FTP as it gives a better experience by allowing user to access the files as if they're still on local disk. And, unlike FTP, media files can be played directly from Samba share. But one might still need FTP server as it offers better performance over Samba.

If the router has at least 8MB flash ROM and happens to run DD-WRT MEGA build, very likely there is a proftpd FTP server built in. But here I'll take some extra trouble to use lightweight vsftpd instead.

So why vsftpd? The main reason is its size. The proftpd is 500KB while vsftpd is only 100KB! This makes it perfect for embedded systems. Also, vsftpd is easy to use and setup.

  1. Disable stock ProFTPD server
    For DD-WRT, it's in Services->NAS. Set it to Disable then click "Apply Settings".

  2. Install vsftpd
    Assume you have followed previous tutorials and has a working opkg system, now use PuTTY to log in the router and run
    opkg install vsftpd

  3. (optional)Add a user for anonymous FTP access
    *ignore this part if you've follow the Samba guide, then this user is already in the system.

    Create or add to /opt/etc/init.d/adduser with following line:

    grep -q nobody /etc/passwd || echo 'nobody:x:65534:65534:nobody:/mnt:/bin/false' >> /etc/passwd

    Above is one single line and will create a new user "nobody" with no valid password and login shell(thus can't be used for login). Then set it to run during boot up:

    chmod a+x /opt/etc/init.d/adduser
    ln -s /opt/etc/init.d/adduser /opt/etc/init.d/S05adduser

  4. vsftpd.conf, the configuration file for vsftpd
    Edit file /opt/etc/vsftpd.conf with below(delete all previous contents if the file is not empty)

    background=YES
    listen=YES
    listen_port=21
    #Change it if you want to use other port
    anonymous_enable=YES
    #Set it to NO if you don't want anonymous FTP access
    ftp_username=nobody
    #local user used for anonymous FTP access, here is "nobody"
    local_enable=YES
    write_enable=YES
    local_umask=022
    check_shell=NO
    session_support=NO

    For a full list of options, please refer to vsftpd website. These basic options here should be enough for home use. With the settings above, the anonymous user will be locked to "/mnt" folder(if you enable the anonymous option). Can also login with other valid user accounts like "root" or "share" with no restriction.

  5. Set vsftpd to run as a service
    Create file /opt/etc/init.d/vsftpd(delete all previous contents if the file is not empty)

    [ -d /var/run/vsftpd ] || mkdir /var/run/vsftpd
    kill -9 $(pidof vsftpd)
    vsftpd /opt/etc/vsftpd.conf

    Then set it to run as a service

    chmod a+x /opt/etc/init.d/vsftpd
    ln -s /opt/etc/init.d/vsftpd /opt/etc/init.d/S60vsftpd

Read More...

Friday, June 25, 2010

Samba the File Share Server in DD-WRT

It's not an easy job to configure Samba share in standard DD-WRT because by default, the /etc folder is read-only. So before start, please following the previous tutorial to set a writable /etc. Also, might to your surprise, DD-WRT does have a Samba3 built in the firmware and it works just fine. In this article, you'll be guided through the whole process to set up a password protected samba share with customized username/password.

  1. Check if there is a Samba server built in
    Log in the router, then run
    smbd --version
    Output should be "Version 3.0.24", which means the firmware has Samba 3.0.24 included.
    If the Samba server is missing, install it by running
    opkg install samba3

  2. Add dedicated users for Samba
    For security reasons, I strongly suggest NOT to use "root" to access your Samba share. Instead, here we'll create users for Samba(and ftp) only with minimal privilege and no login shell.
    First, add the following lines to file /etc/passwd

    nobody:x:65534:65534:nobody:/mnt:/bin/false
    share:x:65534:65534:share:/mnt/share:/bin/false

    Save the /etc/passwd file, then run
    passwd share

    to change the password for user "share".  Now check the content of the updated /etc/passwd file, the line for user "share" will look like:

    share:$1$2zhNidn9$DJK7SG8aqMg2hDsBYv6yZ.:65534:65534:share:/mnt/share:/bin/false

    The red part is the encrypted password. In the example line above, the password is also set to "share".

    To make the change permanent,  create a new script /opt/etc/init.d/adduser

    grep -q nobody /etc/passwd || echo 'nobody:x:65534:65534:nobody:/mnt:/bin/false' >> /etc/passwd
    grep -q share /etc/passwd || echo 'share:$1$2zhNidn9$DJK7SG8aqMg2hDsBYv6yZ.:65534:65534:share:/mnt/share:/bin/false' >> /etc/passwd

    Don't forget to change the red part. Then set it to run during boot up:
    chmod a+x /opt/etc/init.d/adduser
    ln -s /opt/etc/init.d/adduser /opt/etc/init.d/S05adduser


    The Home folder for user share will be /mnt/share, create it if its not present.

    mkdir -m 777 /mnt/share

    Then use smbpasswd to add a samba user with username "share" and password "share"

    mkdir /etc/samba
    touch /etc/samba/smbpasswd
    smbpasswd share share

    #replace the red part with your own password

    Copy the newly created /etc/samba/smbpasswd to /opt/etc/samba/smbpasswd to keep the /etc/ folder clean and in the future all configuration files will be stored in /opt/etc/samba folder. Please leave /etc/samba folder there(don't delete it) as its also required by Samba.

    mkdir -p /opt/etc/samba/
    cp -a /etc/samba/* /opt/etc/samba/
    chmod 644 /opt/etc/samba/smbpasswd

  3. smb.conf, the configuration file for Samba
    Use vi or nano, create file /opt/etc/samba/smb.conf with contents below:

    [global]
            netbios name = DD-WRT
            workgroup = WORKGROUP
            server string = DD-WRT
            syslog = 10
            encrypt passwords = true
            passdb backend = smbpasswd
            obey pam restrictions = yes
            socket options = TCP_NODELAY
            preferred master = no
            os level = 20
            security = user
            guest account = nobody
            invalid users = root
            smb passwd file = /opt/etc/samba/smbpasswd
            unix charset = UTF-8
            dos charset = UTF-8
    [homes]
            comment = Home Directories
            browseable = no
            read only = no
            create mode = 0750
    [USBDrive]
            path = /mnt/
            read only = no
            guest ok = no
            create mask = 0700
            directory mask = 0700


    Now test the file by running

    smbd -s /opt/etc/samba/smb.conf

    and access the Samba server by typing \\192.168.1.1 in the address bar. Login with user "share". You should see two folders: "Share"(/mnt/share) and "USBDrive"(the whole /mnt folder).

    For Windows Vista/7 machine, a compatibility bit must be set to work with the Linux Samba share. See the end of the post.

  4. Run Samba as a service
    If everything works out, it's time for the startup script
    Create file /opt/etc/init.d/samba(delete all previous contents if its not empty).

    kill -9 $(pidof smbd)
    kill -9 $(pidof nmbd)
    /usr/sbin/smbd -s /opt/etc/samba/smb.conf
    #if you installed samba3 through opkg, use
    #/opt/bin/smbd -s /opt/etc/samba/smb.conf


    Then set it to run upon bootup:

    chmod a+x /opt/etc/init.d/samba
    ln -s /opt/etc/init.d/samba /opt/etc/init.d/S50samba


  5. (Optional)Fix Samba and Windows Vista/7
    When accessing Samba from a Windows Vista/7 machine, the password will always be rejected regardless whatever you input. That's because the Samba we used here does not support the new password authorization scheme in Windows.
    To fix:
    Run secpol.msc
    Go to: Local Policies -> Security Options
    Find "Network Security: LAN Manager authentication level" and change setting from "Send NTLMv2 response only" to "Send LM & NTLM - use NTLMv2 session security if negotiated"

    Some Windows versions may not have secpol.msc, in this case, save these 3 lines below to file sambafix.reg and run it:

    Windows Registry Editor Version 5.00
    [HKEY_LOCAL_MACHINE\SYSTEM\CurrentControlSet\Control\Lsa]
    "LmCompatibilityLevel"=dword:00000001

    Reboot the Windows to make the change take effect.

Read More...

Thursday, June 24, 2010

Set DD-WRT to Use Local Time

This never looks to be a problem since DD-WRT provides such extensive options. Unfortunately, unlike Tomato and OpenWrt, which do a good job, DD-WRT's approach is way off and completely wrong.

A Linux box can keep its time in either local time or UTC -- both are fine as long as the corresponding time zone info is presented. However, in DD-WRT, the time zone info is completely missing and instead of standard implementing used in almost all Linux distros, DD-WRT  coins a weird scheme to setup(and keep) the time.

For example, 8AM PST(GMT-8) should be 4PM GMT, but a DD-WRT router would "think" the current time is 8AM GMT. Now if you change the time zone to EST(GMT-5), what will the router think? 11AM GMT!! Yes, that's after you've set all the "time zone" info in DD-WRT web management page. This is usually not a problem if you just want to use it as a router but for a Linux server, you definitely don't want to deal with any file created in future.

Now here is the fix:

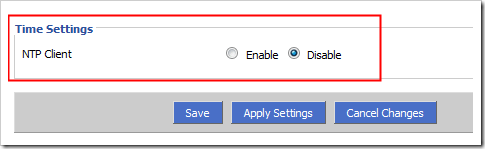
  1. Disable DD-WRT's own NTP client
    From DD-WRT's web interface, Setup->Basic Setup, at the bottom of the page, disable the whole NTP part.
    ntp-disable
    Then click "Apply Settings"

  2. Install our own NTP client
    Use PuTTY to login the router, then run

    opkg install ntpclient

    Then we need to get the newly installed ntpclient running as a service. To do so, use vi or nano and create a file named /opt/etc/init.d/ntpclient

    source /mnt/root/.profile
    /opt/usr/sbin/ntpclient -i 600 -D -s -l -h pool.ntp.org -p 123
    #600 means it will sync every 10 minutes(600 seconds)
    #pool.ntp.org is the NTP server to use

    Give it executable permission and then set it to run on start up.

    chmod a+x /opt/etc/init.d/ntpclient
    ln -s /opt/etc/init.d/ntpclient /opt/etc/init.d/S20ntpclient

  3. Set time zone info for DD-WRT
    First, we need to create the /etc/TZ file with proper time zone info

    echo PST8PDT,M3.2.0,M11.1.0 > /etc/TZ

    The red part an example(US Pacific) and the full list can be found here(the time zone table). Replace it with yours accordingly. And, don't worry about daylight saving time, it's already taken care of.

    We also need to set the TZ variable by adding a line in /mnt/root/.profile

    export TZ=$(cat /etc/TZ)

    Finally, there is a hidden nvram value used by DD-WRT internally, it's also needed to be fixed or the web page will display a wrong time. From PuTTY, run:

    nvram set time_zone=PST8PDT,M3.2.0,M11.1.0
    nvram commit

    #replace the red part with yours.

It's done. Reboot the router and login with PuTTY, type date to check the output. DD-WRT should start using local time now.

Read More...

Software Installation on DD-WRT -- Part 2

In previous part, we have everything settled(almost). Now its the time for some more fine tune.

By employing the techniques in Part 1, we have the following setup upon each reboot:

  • A USB drive mounted and accessible at /mnt
  • A writable /etc folder(actually /mnt/etc) and has exact same content as original /etc folder
  • A writable /opt folder(actually /mnt/opt) -- where all future software will be installed and run from(/opt/bin, /opt/sbin, /opt/usr/bin, just name a few) and keep the original DD-WRT folders like /bin /sbin untouched.
  • A writable and persistent /tmp/root(actually /mnt/root). This will be the home folder for user root
  • An empty file /mnt/optware.enable. This is used to control the whole optware installation. By renaming or deleting this file, all customized software/modification WILL BE DISABLED and thus put the router back to standard DD-WRT. This is useful for debugging and firmware upgrading.

Still, there is something left to do, notably that, with current setup, the LD_LIBRARY_PATH and PATH variables have to be set each time before running any command. We might also want to run some installed software as service.

  1. Set the initial variables
    Login with PuTTY then copy/paste the commands below to PuTTY window to create a script running each time when user root logins.

    cat > /mnt/root/.profile << EOF
    export LD_LIBRARY_PATH='/opt/lib:/opt/usr/lib:/lib:/usr/lib:/opt/usr/local/lib'
    export PATH='/sbin:/opt/bin:/opt/usr/bin:/opt/sbin:/opt/usr/sbin:/bin:/usr/bin:/usr/sbin:/opt/usr/local/bin'
    export PS1='\[\033[01;31m\]\u@\h \[\033[01;34m\]\W \$ \[\033[00m\]'
    export TERMINFO='/opt/usr/share/terminfo'
    EOF

    The above script will set the variables for us and also provide a nice colored command line prompt. Now exit the current PuTTY window and connect again, if you see a colored prompt then it's working correctly. Run
    opkg update
    directly and it should work now -- no need to set the lengthy variables each time. Also, if you're not familar with vi, time to get the nano editor
    opkg install nano
    Then type nano to launch it.

  2. Run installed software as service
    In previous guide(Part 1), our DD-WRT startup script does nothing more than mounting several folders. We don't use it to launch any programs simply because its not necessary as DD-WRT has a feature that, it will run any script during startup automatically once it's in correct location with correct name.

    To run a script with our current setup, all we need to do is to put the scripts to /opt/etc/init.d folder and name them in the format of S##ScriptName. The ## is two digit from 00 to 99, script with smaller number will run first. For example, to run Samba file server and p910nd printer server as services, we just need to create two startup script
    /opt/etc/init.d/p910nd
    /opt/etc/init.d/samba
    then make symbolic links:
    ln -s /opt/etc/init.d/p910nd /opt/etc/init.d/S30p910nd
    ln -s /opt/etc/init.d/samba /opt/etc/init.d/S50samba


    and p910nd will start up first then samba. And, in case you don't need them as service, delete the symbolic links(S30p910nd/S50samba) but keep the original startup script so it can be easily recovered. The program can also be launched directly by running the corresponding script(/opt/etc/init.d/p910nd and /opt/etc/init.d/samba)
    Guide for Samba server and the p910nd printer server will be detailed in future articles. This is just to get you an idea how the startup control system works.

Read More...

Software Installation on DD-WRT -- Part 1

One thing interesting about the router is its exotic hardware specification -- 400MHz processor, 32MB flash ROM, 64MB RAM and most important of all, a USB port. All these make the router a very versatile little Linux box with tons of capabilities. However, one thing might confuse non-experienced users is that, the CPU in the router is MIPS(MIPS in big-endian), while the popular Broadcom routers(such as Linksys WRT54G) are MIPSEL(MIPS in little-endian). I don’t want to go into technical detail here, but just remember, even both are MIPS, they’re different and prebuilt binary for Broadcom routers WILL NOT work on this WZR-HP-G300NH and other Atheros based devices.

Thanks to the OpenWrt guys, with some effort, we can now put the OpenWrt binary on this router and it will run as good as the popular “optware”.

In this tutorial, I'll guide you through the process and all software will be installed on USB disk though the Buffalo router has a gorgeous 32MB flash ROM. The reason is simple – the flash ROM jffs partition will NOT survive during a firmware upgrade and you definitely don’t want to reinstall everything again each time. Also, USB disk is much faster than internal flash.

This guide will also work with other USB enabled Atheros routers such as TP-LINK TL-WR1043ND, Linksys WRT160NL, D-LInk DIR-825 RevB and Netgear WNDR3700

  1. Prepare the USB disk
    Here we can use a USB flash drive or a USB hard drive and the drive must be preformatted to ext2 or ext3(recommended) before plugging into the router.
    Any Linux live CD should do the trick and I personally recommend GParted, which can be installed in CD or USB disk.

  2. Set up DD-WRT accordingly
    a. Turn on ssh.
    This is under Services->Service->Secure Shell. See the picture below. Then click “Apply Settings” at the bottom of the page.
    ssh-enable

    b. Set USB Support
    Under Services->USB tab. Will disable “Automatic Drive Mount” here. After that, click “Apply Settings”usb-enable

    c. Disable the jffs partition
    Under Administration->Management, disable “JFFS2 Support”. After that, click “Apply Settings”.

  3. Download WinSCP, PuTTY and prebuilt libraries
    WinSCP is used to copy file between PC and router and PuTTY is for router shell login. Both are freeware.
    Also, you’ll need some prebuilt OpenWrt libraries called lib.tar(thanks Luyi@DD-WRT forum check original discussion thread)
    Get it from DD-WRT forum(login required) or mirror site.

  4. Now plug in the USB drive and reboot the router.

  5. After rebooting, login the router with PuTTY.
    Fill in router’s IP(192.168.1.1 in most cases), left everything else on default(port 22 and Connection type SSH) and click “Open”.
    The login username is always root and password is the web password you set.

  6. Mount the USB drive
    Type the command in PuTTY window
    ls /dev/discs/disc0/
    and the result might look like this
    disc-partitions
    Now here is the tricky part. If you’re using a USB flash drive with only one partition, most likely, you will only see “disc” but not “part1” and “part2”. If you’re using a USB HDD with multi partitions you might expect an output similar to mine. Both are OK.

    If you see “disc” only, use the command line below to mount an ext3 USB drive to /mnt
    mount -t ext3 -o noatime /dev/discs/disc0/disc /mnt
    *Use mount -t ext2 /dev/discs/disc0/disc /mnt for ext2 drive

    For USB drive with multi partition, the command below will mount the first partition to /mnt. Adjust accordingly.
    mount -t ext3 -o noatime /dev/discs/disc0/part1 /mnt
    *Use mount -t ext2 /dev/discs/disc0/part1 /mnt for ext2 partition

  7. Now create and prepare necessary folders
    Type the commands below in PuTTY

    cd /mnt
    mkdir etc opt root
    touch optware.enable
    chmod 755 etc opt root
    mkdir opt/lib
    chmod 755 opt/lib
    cp -a /etc/* /mnt/etc/
    mount -o bind /mnt/etc /etc
    mount -o bind /mnt/opt /jffs

    So now we have a writable /etc and /jffs folders while they both reside in the USB drive. All other folders -- especially /bin, /usr and /sbin – will be left untouched to keep the change minimal. The /etc folder will also be handled with extra caution.

  8. Extract lib.tar and upload all files to router’s /jffs/lib folder by using WinSCP.
    Same as PuTTY, the username will always be root, the file protocol must be set to SCP. See the picture below
    winscp-login
    After that, ignore all warning messages and click “yes” all the way. You’ll see the file transfer Window then. Also please refer to DD-WRT Wiki if there is any other question.

    Now extract lib.tar(using WinRAR or 7Zip) and upload everything to router’s /jffs/lib folder.

    In the Putty window, run
    ls /jffs/lib
    to make sure all files are uploaded, then run
    chmod a+x /jffs/lib/*
    to set the properties.

  9. Install OpenWrt’s opkg
    Now in the PuTTY window, type

    cd /tmp
    wget http://downloads.openwrt.org/backfire/10.03/ar71xx/packages/opkg_513-2_ar71xx.ipk
    ipkg install /tmp/opkg_513-2_ar71xx.ipk

    After that, run the command to create the configuration file for newly installed opkg

    cat > /etc/opkg.conf << EOF
    src/gz snapshots http://downloads.openwrt.org/snapshots/trunk/ar71xx/packages/
    dest root /opt
    dest ram /tmp
    lists_dir ext /tmp/var/opkg-lists
    EOF

    Also notice the underlined /opt. In the future, all software will be installed to /opt folder in case some might still want to use internal flash. The /jffs folder is only necessary for initial setup.

  10. Set the startup script to make the changes take effect each time upon reboot
    Under DD-WRT’s web interface, Administration->Commands,  input the following command in the window then click “Save Startup”

    #!/bin/sh

    sleep 5
    #mount -t ext3 -o noatime /dev/discs/disc0/disc /mnt
    mount -t ext3 -o noatime /dev/discs/disc0/part1 /mnt
    #choose one for your drive, see Step #6

    sleep 2
    if [ -f /mnt/optware.enable ]; then
    mount -o bind /mnt/etc /etc
    mount -o bind /mnt/root /tmp/root
    mount -o bind /mnt/opt /opt
    else
    exit
    fi

    if [ -d /opt/usr ]; then
    export LD_LIBRARY_PATH='/opt/lib:/opt/usr/lib:/lib:/usr/lib'
    export PATH='/opt/bin:/opt/usr/bin:/opt/sbin:/opt/usr/sbin:/bin:/sbin:/usr/sbin:/usr/bin'
    else
    exit
    fi
     

    Reboot to make the change take effect.

  11. Test opkg package system
    After reboot, login with PuTTY again, run

    export LD_LIBRARY_PATH='/opt/lib:/opt/usr/lib:/lib:/usr/lib'
    export PATH='/opt/bin:/opt/usr/bin:/opt/sbin:/opt/usr/sbin:/bin:/sbin:/usr/sbin:/usr/bin'
    opkg update

    to check if opkg(the OpenWrt’s variant of ipkg) is installed and working properly.
    Then install/upgrade some base libraries and the busybox utility

    opkg install libc
    opkg install libgcc
    opkg install uclibcxx
    opkg install libncurses

    opkg install busybox

Almost done! There’re still some work and fine tune left which will be covered in the next part.

Read More...